Showing posts with label solar. Show all posts

Wednesday, November 12, 2014

Pump Controller For Solar Hot Water System

- 0 comments
This circuit optimises the operation of a solar hot water system. When the water in the solar collector is hotter than the storage tank, the pump runs. The circuit comprises two LM335Z temperature sensors, a comparator and Mosfet. Sensor 1 connects to the solar collector panel while Sensor 2 connects to the hot water panel. Each sensor includes a trimpot to allow adjustment of the output level. In practice, VR1 and VR2 are adjusted so that both Sensor 1 and Sensor 2 have the same output voltage when they are at the same temperature. The Sensor outputs are monitored using comparator IC1.

When Sensor 1 produces a higher voltage than Sensor 2, which means that sensor 1 is at a higher temperature, pin 1 of IC1 goes high and drives the gate of Mosfet Q1. This in turn drives the pump motor. IC1 includes hysteresis so that the output does not oscillate when both sensors are producing a similar voltage. Hysteresis comprises the 1MO feedback resistor between output pin 1 and non-inverting input pin 3 and the input 1kO resistor. This provides a nominal 12mV hysteresis so that voltage at Sensor 1 or Sensor 2 must differ by 12mV for changes in the comparator output to occur.

Circuit diagram:


Since the outputs of Sensor 1 and Sensor 2 change by about 10mV/°C, we could say that there is a degree of hysteresis in the comparator. Note that IC1 is a dual comparator with the second unit unused. Its inputs are tied to ground and pin 2 of IC1 respectively. This sets the pin 7 output high. Since the output is an open collector, it will be at a high impedance. Mosfet Q1 is rated at 60A and 60V and is suitable for driving inductive loads due to its avalanche suppression capability. This clamps any inductively induced voltages exceeding the voltage rating of the Mosfet.

The sensors are adjusted initially with both measuring the same temperature. This can be done at room temperature; adjust the trimpots so that the voltage between ground and the positive terminal reads the same for both sensors. If you wish, the sensors can be set to 10mV/°C change with the output referred to the Kelvin scale which is 273K at 0°C. So at 25°C, the sensor output should be set to (273 + 25 = 298) x 10mV or 2.98V.Note:The sensors will produce incorrect outputs if their leads are exposed to moisture and they should be protected with some neutral cure silicone sealant. The sensors can be mounted by clamping them directly to the outside surface of the solar collector and on an uninsulated section of the storage tank. The thermostat housing is usually a good position on the storage tank.
Author: John Clarke - Copyright: Silicon Chip Electronics
[Continue reading...]

Friday, April 12, 2013

XW Solar E Panel wiring diagram

- 0 comments
While the other is an 80 amp single circuit panel mount device. OutBack Power offers a two circuit 80 amp panel mount DC-GFP that also fits inside the E-Panel. The Xantrex DC-GFP’s will not fit in the E-Panel. The MidNite Solarsingle circuit DC-GFP’s are designed for a single PV array. Two MidNite DC-GFP’s may be used to accommodate two arrays although the dual OutBack would for dual arrays and dual controllers cost less and take up less room. DC-GFP’s are a very misunderstood device. When searching at a wiring diagram you will notice that part of the DC-GFP is a high current breaker. Connected in series with the GFP is yet another high current DC breaker. It is a common mistake to think the second breaker is unnecessary. NEC2008 requires a DC-GFP on all systems whether mounted on the roof top of a residence or not. The NEC also does not allow the DC-GFP to be the PV disconnect. When the DC-GFP is turned off, it leaves the battery negative ungrounded. The only time it is allowed that the system be ungrounded is during a fault condition. This requirement necessitates a PV disconnect in series with the DC-GFP.

Click here to Download XW Solar E-Panel wiring diagram
[Continue reading...]

Thursday, April 11, 2013

Making a Solar Energy Powered an iPhone Battery Charger

- 0 comments
The project was termed as Mighty Minty Boost as it was developed to function as iPod/iPhone charger with solar power. Aside from being small, it has a large battery capacity of 3.7V at 2000mAh and it accepts input power from 3.7V to 7V. As shown in the images below, it can become a compact USB power supply when the solar cell is removed after charging. The Velcro is used to secure the Mighty Minty Boost inside a backpack or messenger bag after unplugging the solar cell.

For faster charging, a larger solar cell can be attached to the bag. Enough power can be generated to fully charge an iPhone in about 5.5 hours and an iPod Touch in 4 hours using a slightly larger solar cell with 6V at 250mAh. The charger will automatically switch to trickle charging when the cell reaches full charge. The charging current is limited to 100mA when charging using the mini USB port and the charging is limited to 280mA when charging using the barrel plug jack

Hacks and Mods: iPhone Charger Powered Thru Solar Energy
.
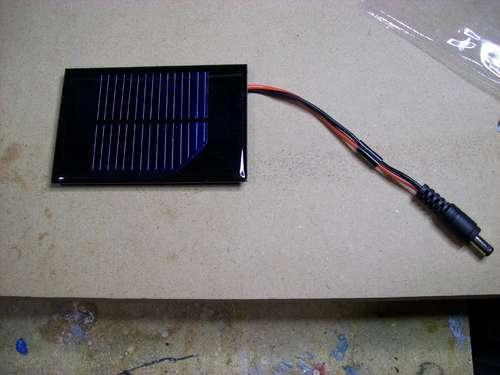
The materials needed to build the charger include a small solar cell, Lithium Polymer battery charger, minty boost kit, adhesive backed Velcro, Altoids tin, connector/wire, and small double adhesive squares as shown in the images below. An input power that ranges from 3.7V to 7V maximum can be accepted by the single cell Lithium Polymer. In bright sunlight, the solar cell maxes out at approximately 5V at 100mA. A larger solar cell with 6V at 250mA can be used for faster charging.

Hacks and Mods: iPhone Charger Powered Thru Solar Energy

The images below show the assembly of minty boost kit where a JST connector is soldered to the minty boost PCB instead of connecting the battery holder in the kit. The minty boost circuit is allowed to connect to the Lithium Polymer battery charger circuit with this tiny connector. The minty boost is tested by connecting the battery pack and the charger circuit, the Lithium Polymer battery connects to the connector marked GND on the charger board and the minty boost connects to the connector marked SYS.

Hacks and Mods: iPhone Charger Powered Thru Solar Energy

To fit the charger, a notch is cut out of the other side of the Altoids tin and used double sided adhesive to secure the charging circuit to the bottom of the Altoids as shown below. The bottom of either one of the circuit boards should not touch the bottom of the Altoids tin while reconnecting the minty boost PCB and the battery to the charging circuit.

Hacks and Mods: iPhone Charger Powered Thru Solar Energy

Connecting or adding the solar cell can be done in different ways. Shortening the connector leads and plugging the barrel plug into the barrel jack on the charging circuit is one way. The other method is using another JST connector to replace the connector and plugging it into the third connector marked 5V on the charging circuit. Since there is no bog barrel plug sticking out of the side of the tin, using the second method is cleaner.

As shown in the photos below, some 2” Velcro was used to attach the solar cell to the top of the Altoids. To help protect the battery, a layer of clear packing tape was used for wrapping. N top of the two circuit boards, the battery pack is then set down. A red LED on the charger board will light up when the Mighty Minty Boost is set out in the bright sun. The iPod/iPhone/USB powered device can be connected once it is fully charged.

Hacks and Mods: iPhone Charger Powered Thru Solar Energy
[Continue reading...]

Sunday, April 7, 2013

Maximizing Solar Panel Efficiency and Output Power

- 0 comments
Improve Solar PV Panel Efficiency and Output Power
There are a number of means available to increase solar panel output and efficiency — some of which may be utilized by the serious experimenter. These are listed as follows:
Solar Cell Technology
There are a number of technologies being researched and there are continual advancements. Experimental technologies and highest efficiencies include:

  • Multi-cell gallium arsenide – 44%
  • Single cell gallium arsenide – 29%
  • Crystalline silicon - 25%
  • Thin film copper-indium-gallium-selenide – 20%
  • Emerging PV technologies (dye-sensitive cells etc.) – 11% (low efficiency, but very inexpensive)
Check out this link for an informative solar cell research chart:
http://upload.wikimedia.org/wikipedia/commons/7/71/PVeff%28rev121211%29.jpg
informative solar cell research chart
Unfortunately, we live in the real world and the highest efficiency technologies are either unaffordable or have not been put into production. As a result, the experimenter is generally stuck with crystalline silicon technology with efficiencies ranging from 15 to 21.5% — this is what I refer to as “practical efficiency.”
Fill factor
Fill factor is simply a fancy term for utilization of available surface area. Full utilization of fill area is required to obtain highest output for a given surface area. The fill factor ranges from about 70 to 90%. You have seen solar panels that utilize round or moon shaped PV cells — well, these have a lower fill factor than square cells. This is not really that important — all it means is that panels delivering a specific power may vary in dimensions somewhat. On the other hand, if attempting to maximize the amount of solar power out of a specific area, then fill factor is an issue.
Grade A, B, C, D
When purchasing name brand solar panels, you will be getting perfect grade A cells. If purchasing garage shop solar panels, the quality of its cells is unknown. If purchasing DIY solar cells, all grades are available, but beware — it is easy to get cheated on quality. If purchasing on eBay, check feedback ratings.
  • Grade A: No imperfections – output = 100% – (name brand panels)
  • Grade B: Cosmetic imperfections – output > 90% – (good for DIY panels)
  • Grade C: Contains chips and/or micro-cracks – output = 75 to 90% – (serious experimentation)
  • Grade D: Fallout – output = 25% to 75% – (just for messing around)
Check out this link just for messing around—note extremely low fill factor:
http://www.instructables.com/id/Make-a-high-powered-solar-panel-from-broken-solar
Note that micro-cracks effectively reduce the fill factor so that it takes a larger surface area (more cracked cells) to obtain the same power output. Micro-cracks can also cause localized heating and roof fires — beware!
For more info, check out http://reviews.ebay.com/Solar-Cell-Grading-A-B-C-D?ugid=10000000017991249
glazed solar panel
Solar Cells Glazing
For long life, solar cells must be protected from the elements (rain, snow, hail, bird dropping etc). Polycarbonate or low-iron glass is generally recommended due to high optical transmissivity — perhaps 90%. Surface coating treatments reduce reflections for even higher transmissivity. Ordinary window glass reduces the output by about 40% — not recommended. Note that my knowledge is weak in this area.
Solar Panel Orientation
For highest output, solar panels must be perpendicular to the sun’s rays. However, it is generally practical and common for roof-top installations to follow the roof pitch and orientation. For other types of fixed installations, the azimuth is oriented to the south and tilt adjusted for the winter sun. Note that solar power is minimized in the winter mostly due to the reduced daylight period; therefore that is the default for fixed orientation. While this is clearly not optimum in the summer, the longer daytime period more than compensates for the compromised tilt angle.
Check out this solar calculator http://energyworksus.com/solar_installation_position.html
Solar tracker
solar trackerSolar tracking is a great way of increasing the output power. It rotates the panel or array of panels so that they always directly face the sun. However, the larger the array, the more difficult will be the mechanics of this task. Some trackers are simply driven by a “clock” motor like a telescope so that it follows the sun (or wherever it is supposed to be in the cloudy sky). Others have active circuitry that adjusts the orientation for maximum power output. Others may be controlled by a shadow feedback signal technique.
Check out this DIY Solar Tracker
The optimum tilt angle changes slowly as the earth rotates on its axis, therefore it is not generally required to track this change automatically. The easiest way to handle this seasonable variable, is to go out and manually adjust the angle every month or so — not a difficult task.
Concentrators
Solar panel output power may be increased via a light concentrator such as a Fresnel lens or mirror. Note that such a lens must be substantially larger than the panel. Also, concentrators may not be practical for a large array, and orientation of the mirror creates an additional tracking problem. Output may be increased by perhaps 50%. Care must be taken to prevent overheating the panel.
Check out this brief video
Solar Charge Controls
Since the solar panel does not put out the correct voltage to charge a battery, it must be controlled via a solar charge controller to prevent battery overcharge. The series voltage regulator control wastes the excess power either by turning off the solar panel current or by dissipating the excess power in heat — that is the function of the heatsink in such controls. electroschematics.com has a number of these controls.

MPPT Controller
MPPT stands for Maximum Power Point Tracking. The MPPT control is different in that it does not turn the excess power into heat — it turns it into additional charge current so that if the solar panel is putting out 10A, the battery may actually be charging at a higher current (perhaps 12A). The control senses both input voltage and current, and then does some math with its microcontroller and makes adjustments accordingly in order to maximize power transfer. It uses switch mode technology.
On the other hand, when the battery is fully charged, it still turns off the solar panel. I was toying with the idea of what to do with this unused power, but have not come up with a really practical use other than perhaps to heat water in a hot water tank.
Here is a popular commercial MPPT control with a great description http://www.windsun.com/ChargeControls/MPPT.htm
Glossary of undocumented words and idioms (for our ESL friends)
transmissivity – noun – ability of a medium to transmit or pass electromagnetic energy — light in this case
garage shop – noun – small scale “bare bones” manufacturing operation (literally in a garage)
bare bones – adjective – simple, limited — literally all that is left after an animal carcass decays…
[Continue reading...]
 
Copyright © 2012. Fast Diagrams - Posts · Comments
Powered by Blogger